Lab 00: Hello, World
Overview
The goal of this assignment is to introduce you to the Python programming
language and the Jupyter Notebook interface. To record your solutions
and answers, create a new Jupyter Notebook titled Notebook 00 - Hello,
World.ipynb and use this notebook to complete the following activities and
answer the corresponding questions.
Make sure you label your activities appropriately. That is for Activity 1, have a header cell that is titled Activity 1. Likewise, use the Markdown cells to answer the questions (include the questions above the answer).
This Notebook assignment is due Midnight Wednesday, September 2, 2015 and is to be done individually.
Activity 0: Bitbucket + Anaconda
Before working on this Notebook, make sure you have done the following:
-
First, make sure you have followed the guide below in creating a Bitbucket account, forking a private copy of the class Git repository, and setting the appropriate access and privacy settings:
-
Second, you will need to install the Anaconda Python distribution. To do this, you can follow the video below:
You can also follow the installation directions in the official Anaconda documentation.
Once you have both Bitbucket setup and Anaconda Python installed, you are now ready to complete the Notebook assignment.
Activity 1: Hello, World
The first activity is to simply print the text "Hello, World" to the
screen:
print "Hello, World"
To do this, simply type the Python code above into a code cell.
Clicking on the Run Cell (i.e. play) button at the top of the notebook
will then execute the code in this cell. Alternatively, you may use the
keyboard shortcut Shift-Enter to execute the current cell.
Questions
For the remainder of this activity, answer the following questions:
-
How would you print
Hello, <YOUR NAME>? That is, if your name is Bob, have it displayHello, Bob. -
What happens if you leave off the trailing or last
"and try to execute the Python code? What do we call this? -
How would you print some text that included a quote (i.e.
Bob said,
"FIRE WALK WITH ME."
? Hint
Save Early, Save Often
To prevent losing your work, it is recommended that you save as early and
as often as possible. You can do this quickly with the keyboard shortcut
Control-S.
Activity 2: Formatting
For this activity, you are to practice printing formatted strings. Often times, we will want to output some text with some values embedded in it. To do this, we can use a technique called string formatting:
Questions
Using the resources above as references, complete the following tasks by utilizing string formatting:
-
Print
Hello, <YOUR NAME>!without including<YOUR NAME>in the string. -
Print the value of
piwith 4 decimal points. Your program should output the following:The value of pi is: 3.1416. -
Print the following table (note the alignment):
Number  Square
     0       0
     1       1
     2       4
     3       9
     4      16
     5      25
     6      36
     7      49
     8      64
     9      81
    10     100
LMGTFY
A large part of the practice of programming is searching for documentation, analyzing examples, and seeking outside help. Feel free to use Google, Stack Overflow, and other resources to look up information.
Activity 3: Hello, Input
The last activity is to combine the previous two activities by prompting the user for their name and then printing the message:
Hello, <name>! It's nice to meet you!
To prompt the user for input, you should use the raw_input() function.
Your program output and behavior should be as follows:
What is your name? Peter
Hello, Peter! It is nice to meet you!
Questions
After completing the activity above, answer the following questions:
-
Explain what the raw_input() function does and how you used it.
-
Did you use string formatting in your solution? If so, how would you have done it without string formatting? If not, how would you do it with string formatting? What is your preference and why?
Submission
To submit your work:
-
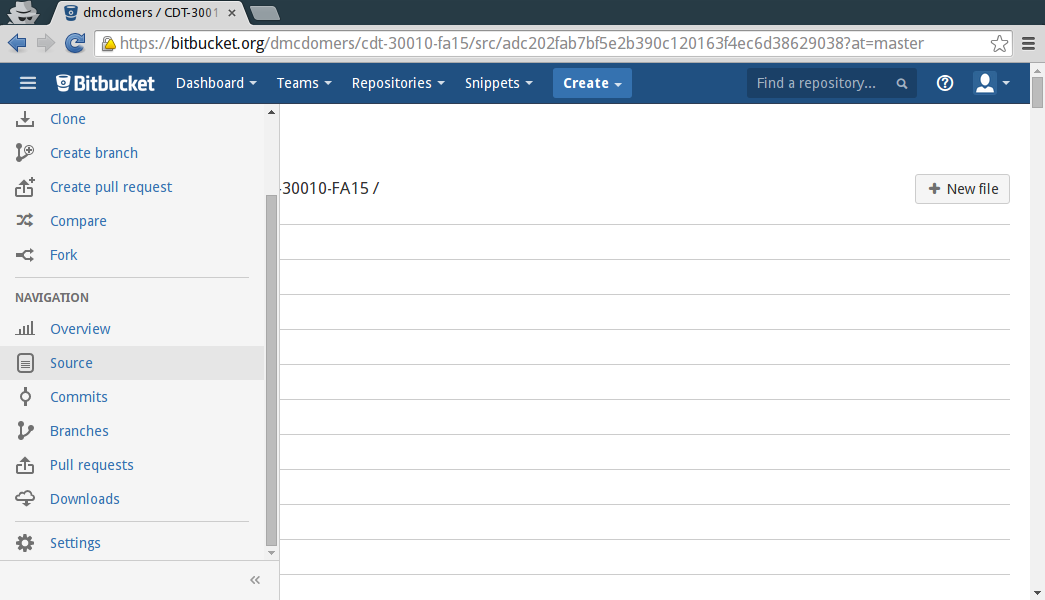
Go to your private Bitbucket class repository, expand the left sidebar menu by clicking on the >> chevron on the bottom left-hand corner to expose the menu and the click on the Source link.

-
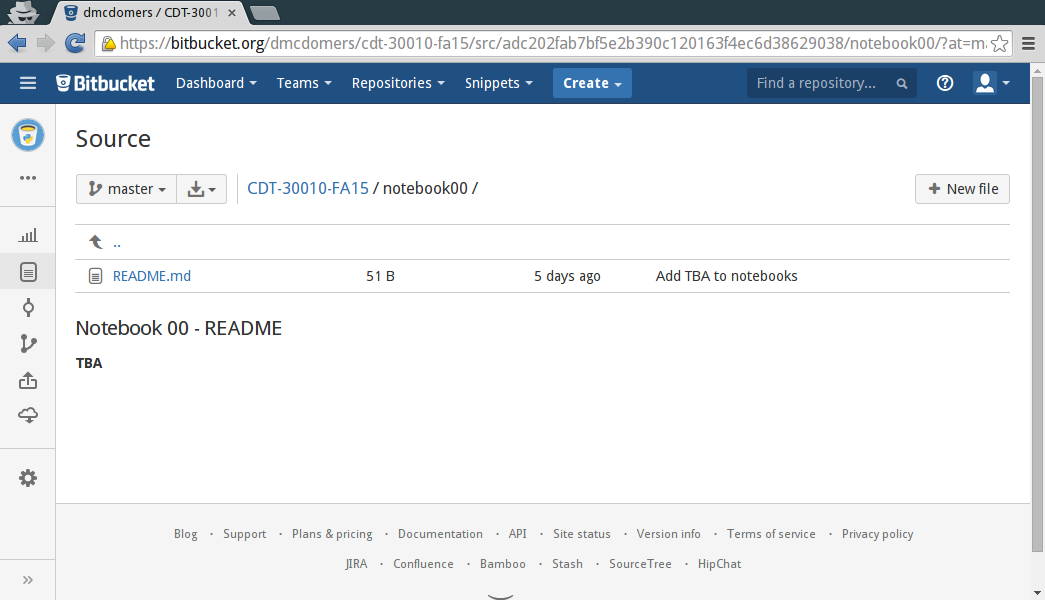
Navigate to the notebook00 folder by clicking on the correpsonding link. Next, click on the + New file button on the upper right-hand corner to create a new file.

-
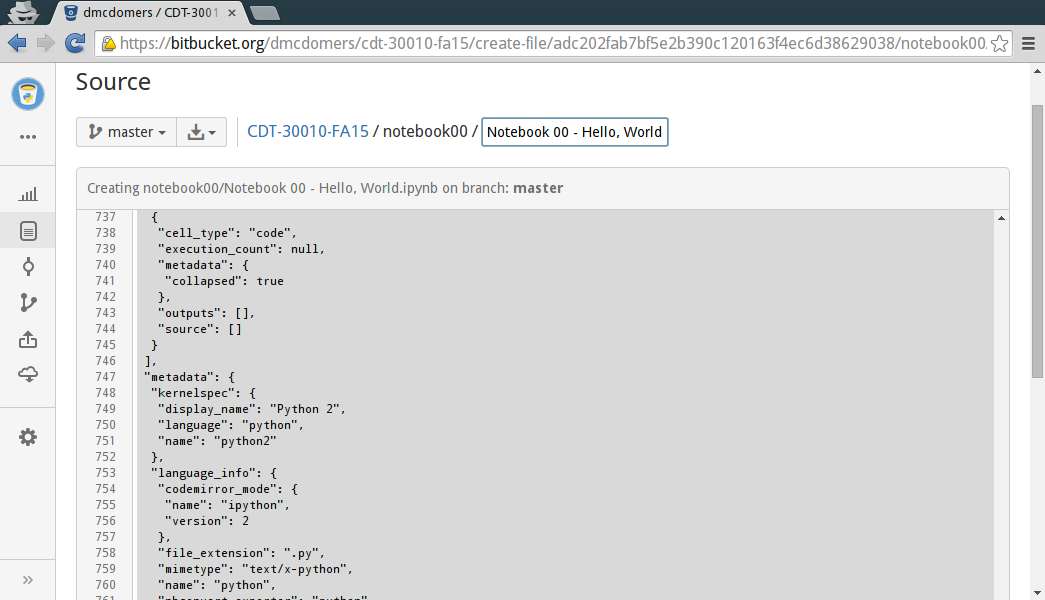
Next, drag-and-drop your Notebook until the text area of the new file. Once that is done, you should see your Notebook data on the webpage. You can now press the Commit button at the bottom to save your Notebook.

-
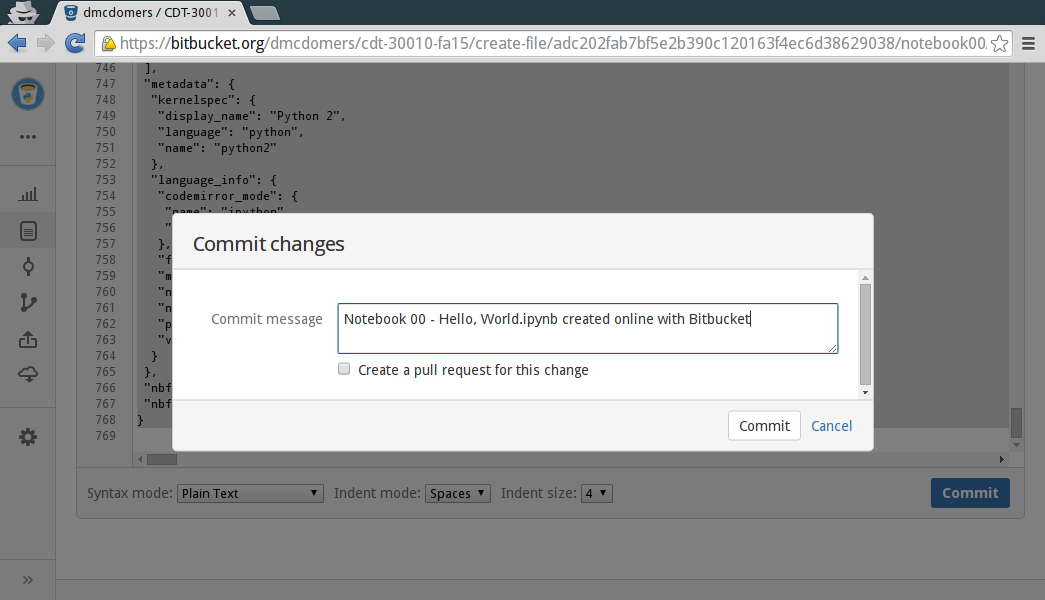
This will take you to the dialog box below. Modify the Commit message to something descriptive such as "Notebook 00 - Activity 1 complete. Afterwards, simply press Commit** to complete the process.
Do not check the Create a pull request for this change.

Once this is done, your Notebook will now appear in file listings under the notebook00 folder.
If you wish to submit a new version of your Notebook, simply navigate to the file and select the Edit button. Once again, drag-and-drop your new Notebook onto the text area of the file and then repeat the Commit sequence.
You may commit your work as many times as you want until the deadline. In fact, you may wish to commit after each activity so that you have different checkpoints.