Homework 02: Scripting the Shell
The goal of this homework assignment is to allow you to practice shell scripting and explore networking in a Unix environment.
For this assignment, record your responses to the following activities in the
README.md file in the homework02 folder of your assignments GitLab
repository along with any other scripts you create and push your work by
11:59 AM Saturday, February 2.
Activity 0: Pulling Changes
Before starting this homework assignment, you should first perform a git
pull to retrieve any changes in your remote GitLab repository:
$ cd path/to/repository                   # Go to assignments repository

$ git checkout master                     # Make sure we are in master branch

$ git pull --rebase                       # Get any remote changes not present locally
You will need to do this from time to time since the TAs will be grading your
assignments and merging in your previous work. To integrate these changes
into your local repository, you will need to do a git pull to retrieve it
from the remote GitLab repository.
Note: If you get the following messages when you do a git push:
! [rejected]        master -> master (fetch first)
error: failed to push some refs to 'https://gitlab.com/pbui/cse-20289-sp19-assignments'
hint: Updates were rejected because the remote contains work that you do
hint: not have locally. This is usually caused by another repository pushing
hint: to the same ref. You may want to first merge the remote changes (e.g.,
hint: 'git pull') before pushing again.
hint: See the 'Note about fast-forwards' in 'git push --help' for details.
Or:
! [rejected]        master -> master (fetch first)
error: failed to push some refs to '...'
To prevent you from losing history, non-fast-forward updates were rejected
Merge the remote changes before pushing again.  See the 'Note about fast-forwards'
section of 'git push --help' for details
This means you need to perform a git pull and merge in the remote changes
before performing a git push as described above.
Don't forget to create a new branch for this assignment:
$ git checkout -b homework02              # Create homework02 branch and check it out

$ cd homework02                           # Go into homework02 folder
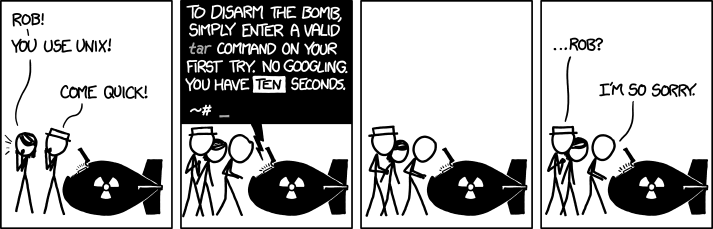
Activity 1: Saving the World (3 Points)
For the first activity, you are to extend the initial prototype below to
create a script called extract.sh which will unpack any tarball or
archive:
#!/bin/sh

# Initial prototype

case $1 in
    *.tar.gz)
        tar xzvf $1
        ;;
esac
This would be handy should you ever face the following situation:
Task 1: extract.sh
The extract.sh script takes a list of archives as arguments. For each of
these archives, the script determines which command is necessary to extract
or unpack the archive based on the file extension and then executes the
appropriate command. The script should support the following extensions:
.tgz, .tar.gz         # gzip
.tbz, .tar.bz2        # bzip2
.txz, .tar.xz         # xz
.zip, .jar            # zip
If no arguments are passed to the script, then extract.sh should display a
usage message and exit with an error code. Likewise, if an archive with
an unknown extension is provided, the script should emit the message
"Unknown archive format: " followed by the name of the file, and exit with
an error code. Finally, if extracting any of the arguments fails, then the
script should ultimately exit with an non-zero error code.
Here is an example of extract.sh in action:
# Display usage message
$ ./extract.sh
Usage: extract.sh archive1 archive2...

# Download test archive
$ curl -LOk https://www3.nd.edu/~pbui/teaching/cse.20289.sp19/static/tar/cmatrix-1.2a.tar.gz

# Extract test archive
$ ./extract.sh cmatrix-1.2a.tar.gz
cmatrix-1.2a/
cmatrix-1.2a/NEWS
cmatrix-1.2a/TODO
cmatrix-1.2a/aclocal.m4
cmatrix-1.2a/README
cmatrix-1.2a/configure
cmatrix-1.2a/configure.in
cmatrix-1.2a/cmatrix.1
cmatrix-1.2a/cmatrix.c
cmatrix-1.2a/config.guess
cmatrix-1.2a/install-sh
cmatrix-1.2a/cmatrix.spec
cmatrix-1.2a/cmatrix.spec.in
cmatrix-1.2a/matrix.fnt
cmatrix-1.2a/config.sub
cmatrix-1.2a/missing
cmatrix-1.2a/mkinstalldirs
cmatrix-1.2a/Makefile.am
cmatrix-1.2a/Makefile.in
cmatrix-1.2a/mtx.pcf
cmatrix-1.2a/config.h.in
cmatrix-1.2a/matrix.psf.gz
cmatrix-1.2a/stamp-h.in
cmatrix-1.2a/AUTHORS
cmatrix-1.2a/INSTALL
cmatrix-1.2a/ChangeLog
cmatrix-1.2a/acconfig.h
cmatrix-1.2a/COPYING

# Try to extract unknown format
$ ./extract.sh README.md
Unknown archive format: README.md

# Remove extracted folder
$ rm -fr cmatrix-1.2a
Hints
The hints may spoil the surprises in the journey, so only view them when you are stuck: Toggle Hints
Task 2: test_extract.sh
To aid you in testing the extract.sh script, we are providing you with
test_extract.sh which you can use as follows:
# Download Makefile
$ curl -LOk https://gitlab.com/nd-cse-20289-sp19/cse-20289-sp19-assignments/raw/master/homework02/Makefile

# Download test scripts and run all tests
$ make

# Run test script
$ ./test_extract.sh
Testing extract.sh ...
Usage                                    ... Success
tgz                                      ... Success
tar.gz                                   ... Success
tbz                                      ... Success
tar.bz2                                  ... Success
txz                                      ... Success
tar.xz                                   ... Success
zip                                      ... Success
jar                                      ... Success
Multiple                                 ... Success
Unknown                                  ... Success
    Score 2.00
Test Scripts
Note, the test scripts are meant as a smoke test but are not considered exhaustive or comprehensive. That is, if there is a failure during testing then that indicates that something is most likely wrong with your script. On the other hand, if the test script succeeds, then you can be confident in the functionality of your script, but it is not guaranteed it is 100% correct.
Task 3: README.md
In your README.md, describe how you implemented the extract.sh script. In
particular, briefly discuss:
-
How you checked and handled having no arguments.
-
How you handled multiple arguments.
-
How you determined which command to use for each argument.
-
How you checked the result of each extraction command.
Design Questions
Rather than waiting to answer these README.md questions after you have
written extract.sh, consider using them as brainstorming prompts. That
is, if you can answers these design questions, then you would be able to
generate an outline or sketch of the program you need to implement.
Activity 2: Brute-force Attack (3 Points)
For the second activity, you are to create a script called crack.sh, which
performs a brute-force attack on a single executable program:
In cryptography, a brute-force attack consists of an attacker submitting many passwords or passphrases with the hope of eventually guessing correctly. The attacker systematically checks all possible passwords and passphrases until the correct one is found. -- Wikipedia
In our scenario, the password to the target program is embedded in the
program itself. The job of the crack.sh script is to try all the strings
inside the program in order to unlock the program and receive a token.
Task 1: crack.sh
The crack.sh script takes a single executable program as an argument. It
should then perform the following actions:
-
Verify that the program is readable. Otherwise, it should display an error message and exit with a non-zero status code.
-
Verify that the program is executable. Otherwise, it should display an error message and exit with a non-zero status code.
-
Attack the program by attempting every string embedded in the program as the command-line argument to the target program. When a token is returned, then unlocking the program was successful, so display a message with both the password and token.
For example, there is a mysterious LOCKBOX in the following location:
/escnfs/home/pbui/pub/bin/LOCKBOX
Running the crack.sh script on this LOCKBOX should generate the
following message:
# Crack mysterious LOCKBOX
$ ./crack.sh /escnfs/home/pbui/pub/bin/LOCKBOX
Password is cGJ1aQo=
Token    is 1cc8de27f54ab8f6ab92706354d483e5e5efc6d1
This means that the password for the LOCKBOX was cGJ1aQo= and that
the token returned by the LOCKBOX was
1cc8de27f54ab8f6ab92706354d483e5e5efc6d1.
Here are some more examples of crack.sh in action:
# Display usage message
$ ./crack.sh
Usage: crack.sh executable

# Run crack on a non-existent file
$ ./crack.sh fake.news
/home/pbui/cse.20289.sp19/assignments.pbui/homework02/fake.news is not readable!

# Run crack on a non-executable file
$ ./crack.sh /etc/hosts
/etc/hosts is not executable!

# Run crack on an uncrackable file
$ ./crack.sh uncrackable
Unable to crack uncrackable
Note, you must match format of the messages to pass the automated tests.
Hints
The hints may spoil the surprises in the journey, so only view them when you are stuck: Toggle Hints
-
You can use the readlink command to form the full path to a program.
-
You should use the test command to check if the program is readable or executable.
-
You should the strings command to extract all the strings from a program.
-
You should consider using command substitution to capture the output of a program.
-
You should use the test command to check if a variable is empty.
Task 2: test_crack.sh
To aid you in testing the crack.sh script, we are providing you with
test_crack.sh which you can use as follows:
# Download Makefile
$ curl -LOk https://gitlab.com/nd-cse-20289-sp19/cse-20289-sp19-assignments/raw/master/homework02/Makefile

# Download test scripts and run all tests
$ make

# Run test script
$ ./test_crack.sh
Testing crack.sh ...
Usage                                    ... Success
Readable                                 ... Success
Executable                               ... Success
Crackable                                ... Success
Uncrackable                              ... Success
    Score 2.00
Task 3: README.md
In your README.md, describe how you implemented the crack.sh script. In
particular, briefly discuss:
-
How you checked if the program was readable or executable.
-
How you extracted all the possible passwords.
-
How you determined when the program was cracked.
Computer Security
This activity is inspired by an assignment from the Computer Security course taught by Walter Scheirer. You should take this course in future if this sort of stuff interests you. Likewise, also consider the whole Cyber Security concentration program.
Activity 3: Meeting the Oracle (4 Points)
For the third activity, you are to go down the rabbit hole and talk to the Oracle:
Of course, access to the Oracle is heavily restricted, so you will need to use your hacking skills to locate her and gain an audience with her. Once you connect with her, she will hopefully give you a message about how to use your awesome Unix skills.
To begin your journey, you will have to find the entrance to her sanctuary.
Thanks to a glitch in the Matrix we have been able to narrow her location
to the machine xavier.h4x0r.space. Scan that machine for a HTTP port in
the 9000 - 9999 range and then proceed down the path of discovery and
enlightenment.
As you travel to the Oracle, record what you witnessed and what commands
you executed in your README.md. Be as thorough as possible, since we will
need this log to reconstruct your path and hopefully use it for future
meetings. Here is an example of what your README.md for this activity should
look like:
### Activity 3: Meeting the Oracle

1. My first step was to scan `xavier.h4x0r.space` for a HTTP port:

        $ command ...
        Output...

    As can be seen, there are `X` ports in the `9000` - `9999` range.

2. Next, I tried to access the HTTP server:

        $ command ...
        Output...

...
At the end of your journey, reflect on what the Oracle told you and what you learned in your journey down the rabbit hole.
Student Machines
This activity requires that you work on the student machines or have access to ESCNFS on your Unix machine.
Hints
The hints may spoil the surprises in the journey, so only view them when you are stuck: Toggle Hints
Guru Point (1 Extra Credit Point)
For extra credit, you are to customize your favorite $EDITOR by adding
useful programming or development extensions and plugins that will make
your Unix programming environment more productive. Here are some
sources of inspiration:
Nano
Vim
Emacs
If you come across any other tutorials or resources, please share them on Slack.
Verification
To get credit for this Guru Point, show your text editor customizations to the instructor or a TA to verify. You have up until a week after this assignment is due to verify your Guru Point.
Feedback
If you have any questions, comments, or concerns regarding the course, please
provide your feedback at the end of your README.md.
Submission
To submit your assignment, please commit your work to the homework02 folder
of your homework02 branch in your assignments GitLab repository:
$ cd path/to/repository                   # Go to assignments repository
$ git checkout master                     # Make sure we are in master branch
$ git pull --rebase                       # Make sure we are up-to-date with GitLab
$ git checkout -b homework02              # Create homework02 branch and check it out
$ cd homework02                           # Go to Homework 02 directory
...
$ git add Makefile                        # Mark changes for commit
$ git commit -m "homework02: Makefile"    # Record changes
...
$ $EDITOR extract.sh                      # Edit script
$ git add extract.sh                      # Mark changes for commit
$ git commit -m "homework02: activity 1"  # Record changes
...
$ $EDITOR crack.sh                        # Edit script
$ git add crack.sh                        # Mark changes for commit
$ git commit -m "homework02: activity 2"  # Record changes
...
$ $EDITOR README.md                       # Edit appropriate README.md
$ git add README.md                       # Mark changes for commit
$ git commit -m "homework02: README"      # Record changes
...
$ git push -u origin homework02           # Push branch to GitLab
Remember to create a merge request and assign the appropriate TA from the Reading 02 TA List.